
When I told my colleagues that I am gonna need to apply for Japan visa, most of them were surprised 😓
What do you mean you need to apply for Visa just to go to Japan? I thought Indonesians don’t need to apply!
Well, sorry to burst your bubble… but yep, Indonesians DO still need to apply for visa (I know, sucks. But ordinary people can’t choose.)
My last two trips to Japan didn’t need me to take care of my visa on my own. When I went there for research student program, my visa was taken care of Japan Embassy in Indonesia. When I had my on board training last year, my visa was handled by my office manager as well. So this trip is going to be my first time applying visa on my own.
For something like this, I usually would do research first before preparing the documents, i.e surfing for other people’s experience; but since I didn’t really have time (lies, I know.), I decided to just go ahead with what I saw on their website for short term visit pass requirements.
Based on the link, I need to prepare these documents:
- Passport (original) – OK. Should be easy. Considered done.
- Visa application form and 1 passport-sized photo – A bit challenging to fill up. More details below.
- Certification of employment (original) – Need to request this to your boss. But OK, this one is easy as well.
- Flight itinerary – printed out the e-itinerary.
- Updated bank statement – printed out from e-banking. Actually from the explanation on the website, PRs don’t need to submit bank statement if we can produce valid Certification of Employment; but we still printed and brought it anyway, just in case.
- Identity card (photocopy) – Done.
- Letter of Authorization – Husband needed to sign this as I was the one submitting the visa application on behalf of him.
Right, sounds easy. Should be OK. But the fact is, we encountered some minor problems when we tried to complete the documents.
❗️ Some columns in visa application form are questionable for us. Like, Japan guarantor details. We even needed to fill up the DOB of the guarantor 😨 We don’t have a guarantor for this trip, what should we do? After searching for other people’s experience and asked my friends, finally we just filled up those questionable ones with ‘N.A’
❗️ There is also a column of ‘ID Number issued by your government’. At first I thought this was supposed to be your passport no. But below that column, there is also another column to fill up your passport no! So, we went and fill it up with our Citizen number (KTP, if you will). As for Zal’s application, we just wrote ‘N.A’, because although he’s Indonesian, he doesn’t have ID number yet – not even Indonesian birth certificate.
❗️ We had some doubts with Zal’s documents. Obviously, he doesn’t have some documents listed on the website, e.g Certification of Employment, Bank Statement, etc. So I sent an email inquiry to the embassy, and they replied with this list as per below (really fast!)
- LETTER OF SPONSORSHIP – A letter of sponsorship from the financial sponsor. (From mother/father. In Zal’s case, I will be his sponsor)
- PROOF OF RELATIONSHIP (Photocopy) – Documents such as Certificate of Marriage and Certificate of Birth are required to be submitted if the sponsor is an immediate family member of the applicant. (I submitted his Birth Certificate which has my name there as his mother)
- OTHER REQUIREMENTS OF SPONSOR – Sponsors should submit their personal bank statement or updated bank passbook showing the latest 1-month’s banking transactions, together with photocopies of passport and Singapore I.D (i.e. Permanent Resident I.C., Employment Pass, Work Permit, SV Pass or Dependent Pass). (I didn’t submit my passport copy and only my IC copy)
❗️ Passport-sized photo is also a problem when you have a toddler. It’s so difficult to take Zal’s photo without him moving around or trying to take away the camera from you. So I finally resorted to use his photos from his latest LTVP’s application back in April. He was crying in that picture, but I figured it should do anyway.
❗️ Since we’re going to use AirBNB for our accommodation, I also printed out our booking confirmation for our rooms. I also wrote down the address of the AirBNB accommodation for our Visa application form.
*
Short term visit pass to Japan is applicable for 90 days. Since we’re going to travel in November, it should be safe if we apply for it in October. But being a kiasu people that we are, of course we decided to submit earlier. Like, a month earlier.
So we decided to apply by end of September. I took one day leave just to apply for it cause in my mind, it would be very crowded and I don’t like the feeling of being chased by time and rushed back to work. Moreover, the visa application operating hours is only from 8.30 am – 12.00 pm, so I really need to rush.
I don’t know why but in Singapore, embassies are always located in a location far from everywhere and it’s usually very very secluded. Like for instance, Indonesian Embassy. You will still need to take bus from nearest MRT station, and then you still need to walk about 15 mins from the bus stop! This is why I am always so lazy to visit ANY embassy in Singapore. The fastest way to reach embassy is by cab, and it’s gonna cost me a lot!
Japan Embassy is no different. It’s at 16 Nassim Rd, and if you take a look at Google Maps, you would soon notice that it’s again located in a secluded area near Orchard. But I had no choice. So I promised myself I am gonna wake up early and reached there early as well hence I don’t need to take a cab at all.
Obviously, it didn’t happen. Having a toddler that goes to sleep around midnight does make you question your ability to wake up early 😓
I only woke up at 8.30 am on D-day, and I still needed to pump cause I couldn’t bring Zal with me (damn you haze), so I ended up only leaving house around 10 am. And of course, I took a cab. There goes my plan to save money 💸
Anyway, this is how Japan Embassy looks like.
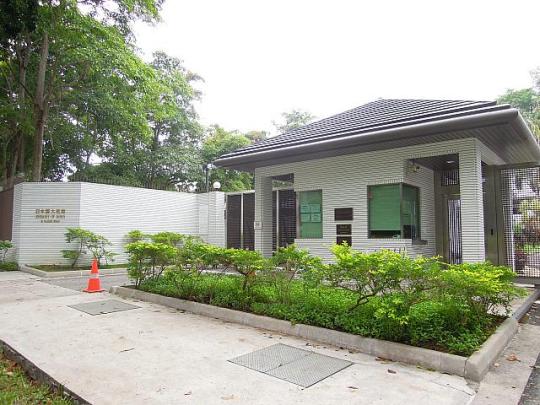
Picture from here.
If there’s no plate outside with the writing “Japan Embassy”, I swear no one would ever thought that that place is an embassy.
I went through the guard and told him that I was there to apply for visa. He checked my IC and let me pass. Went inside and I found out the room for visa application is just on my left. That was handy.
Once inside, there is a queue machine. I took my number and sat on the chairs. There were only quite a few people there, surprisingly. I didn’t take a picture inside cause I thought it’s not allowed.
I only waited for about 10 minutes until my number was called. The lady asked how many applications I was going to submit. Then she asked me to remove the passport’s cover. First she checked my husband’s documents, then she moved to Zal’s documents, before she realized that I am his sponsor.
💁 : “So, you are the sponsor for your son?”
😸 : “Yes, I am.”
💁: “OK, then I check yours first.”
Then she took my documents and checked mine. When she’s done with mine, she went through Zal’s documents once again.
💁: “Ohhh, why is he crying?” *points at his picture*
😸: “Errr. Not easy to take his picture.”
And then, that’s it! Done. I was given three receipts to take the visa 3 days after. I thought I am supposed to make payment on the spot, but apparently, the payment is when you fetch the visa.
I went outside when it’s done. Feeling happy that the whole process just took me about 15 minutes. I wonder why it can be this fast in Singapore but not in Indonesia?
*
Will update this post later when we received our visa! 🎉🎉
Update by 30.10.15
Yay, got our visa, alhamdulillah! They only gave us 15 days, but it’s already more than enough 🙂 Now, off to itinerary!
*
Japan Visa Application
Where to apply : Japan Embassy at 16 Nassim Rd
Fee : 35 SGD / visa (payment when you collect the visa)
Visa application time : before lunch
Visa collection time : after lunch